Superdeterminant hybrid tomato variety Olya was bred at the beginning of the XIX century. It is characterized by high adaptive abilities and gives a record number of crops.
Grade description
General description of the tomato variety Olya F1:
- plant applies to early hybrids - the crop ripens in 100-105 days;
- bushes superdeterminant type reach 100-120 cm in height, need to be tied up;
- plants form a small number of weakly leafy side shoots, which simplifies the care of them;
- light green leaf plates, bifibrous;
- Olya tomato immediately forms 3 brushes of flowers;
- up to 15 tomatoes ripen on one bush;
- the fruits are flat round, slightly ribbed, painted in a bright red color, reaching a diameter of 5–7 cm;
- inside the fetus there can be from 3 to 6 chambers filled with juice and seeds;
- fetal weight - 130-140 g;
- the skin of the fruit is shiny, of dense structure;
- sweet and sour flesh;
- the fruits tolerate transportation over long distances, are weakly susceptible to mechanical damage, retain their original qualities for a long time;
- the variety is resistant to tobacco mosaic, fusarium, cladosporiosis, infection with nematodes;
- productivity is 25 kg / 1 sq. m;
- may be affected by whitefly, Colorado potato beetle, and bear;
- landing density - up to 4 copies per 1 square. m;
- refers to universal varieties, which are suitable for fresh consumption and for conservation.

Advantages and disadvantages
- Grade Advantages:
- precocity
- friendly ripening of fruits;
- undemanding care;
- resistance to temperature extremes;
- high preservation of the crop and its commercial qualities;
- universality in use.
- The disadvantages of the variety:
- F1 hybrids are not intended for seed selection for planting in the second year;
- with improperly organized care, the branches break under the weight of the fruit.
Self-growing seedlings
The Olya tomato variety is suitable for indoor and outdoor cultivation. Productivity directly depends on growing conditions. The soil begins to be prepared in advance, immediately after harvesting on the site.
Sowing seeds is carried out after assessing the climate of the region. It should also be borne in mind that from the moment of sowing the seeds to the formation of a full-fledged seedling capable of transferring picking and acclimatization in a new place, it will take 2–4 weeks.Did you know? The smallest tomato in the world weighs 10 g, and the largest - 1.5 kg.

Optimum timing for sowing
Sowing of seeds is carried out in mid-March. In this case, by mid-May, the seedlings will be ready for transplanting into the open ground.
The soil
The variety develops well on loose, well-permeable moisture soils. Particular attention should be paid to the presence of mineral and organic substances. On the site for planting in the fall, you need to remove the remains of the crop, roots and tops of weeds. Then apply organic fertilizer. You can use cow dung - 10 kg per 1 sq. Km. m. After this, the site is dug up to a depth of 20 cm.
For planting seedlings, it is necessary to prepare a soil mixture consisting of:
- 1 part peat;
- 1 parts of wood sawdust;
- 2 parts of fertile soil.
 For 10 kg of soil mix add:
- 100 g of crushed eggshells, previously fried in an oven at a temperature of +60 ℃;
- 500 g of wood ash;
- 2 tbsp. superphosphate.
After thorough mixing, 1 liter of hot 1% potassium permanganate solution is added to the soil. This technique will ensure disinfection of the soil. The cooled soil mixture is laid out in containers for germination.
Did you know? For a long time on the territory of modern Russia, tomatoes were considered inedible and were bred in private lands, like ornamental plants. They started to eat only in the 19th century.
Capacity for growing
For sowing seeds, you can use:
- Special boxes - the method is not very convenient, because after the emergence of seedlings, it will be necessary to transplant the seedlings into different containers, which is not always well tolerated by the seedlings.
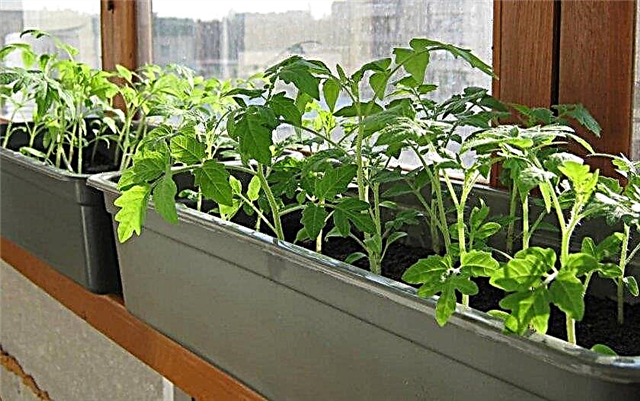
- Separate plastic cups - in this case, transplantation is carried out once in the prepared soil by the transshipment method.

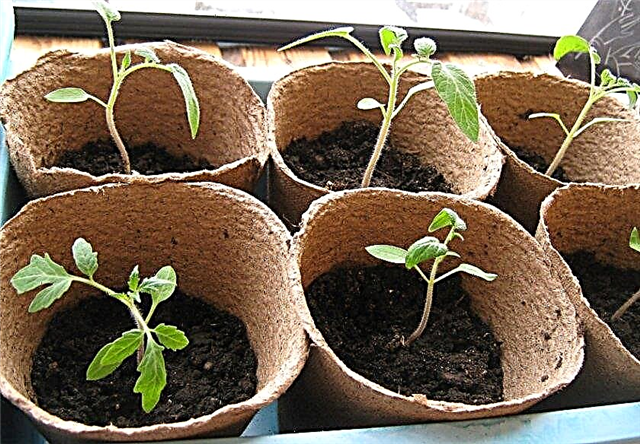
- Peat cups or pots - when transplanting, seedlings can be placed in the soil directly in these containers, they quickly decompose upon contact with the soil, ensuring its enrichment. The only drawback is the need to carefully monitor the soil moisture, since the water in such tanks evaporates much faster.
Seed preparation
The next step is the preparation of seed material. First you need to reject the empty seeds. To do this, dissolve 1 teaspoon of salt in 200 ml of warm water. Instead of salt, you can use a 1% solution of manganese. All seed material is placed in a liquid and left for 20 minutes. Floated seeds are discarded, and those sunk to the bottom are washed with running water and dried on a paper towel.
Before sowing, the germination procedure is carried out. For this, a layer of moistened gauze is placed in a plate and seeds are placed on it in one layer. Water should lightly cover the seed. In this form, the seeds are left for 12–18 hours at a temperature of + 20–25 ℃.Sowing seeds
When sowing, the soil is pre-moistened. Small furrows are made in common boxes at a distance of 5 cm, 1 cm deep. Seeds are placed in furrows at a distance of 5 cm from each other and sprinkled on top of the soil. With separate containers, everything is simpler. In the central part place 1-2 seeds and sprinkle them with soil.
 The containers are covered with film or glass to provide a greenhouse effect. Humidification is carried out on demand. Every day for 20-30 minutes the film or glass is removed to ventilate the soil. Until the first shoots appear, the containers are kept in a darkened room at a temperature of + 20–25 ℃.
Seedling Care
As soon as the first shoots appear, the cover is removed. Seedling containers are installed in a well-lit room, near the southeast windows, but not in direct sunlight. Watering begins from the 4th day after the appearance of the sprouts, introducing 2 hours of water to each plant, distributing it along the edge. With the advent of 3 full leaves, the water norm is increased to 100 ml per one seedling.
When growing in a common box, diving is carried out 2 times:
- after the appearance of 3 full sheet plates;
- 3 weeks after the first dive.
Tomatoes can be fertilized with yeast.
1.5 weeks after the first pick, the seedlings are fertilized with nitrogen fertilizers. This will allow plants to develop a powerful green mass. Plants that initially grow individually, pinch the growth point 2 times in the same time for a dive.
Seedling hardening
Provided that the seeds were planted in mid-March, already from April 15, you can begin to carry out the hardening procedures for seedlings and after about a month to plant it in the ground.
Important! Hardening is a procedure that allows to increase the adaptive abilities of plants and their immunity. Every pick and change of place is stressful for the whole plant organism. If hardening is not carried out, then during adaptation to new conditions, plants can significantly slow down growth and become ill or die.
Seedlings begin to be exposed on a glassed-in balcony from 9 a.m. on sunny days for 30-40 minutes. Over 3-4 days, the time is increased by 1 hour. It is important to ensure that the air temperature does not drop to + 10–11 ℃. From the 5th day they begin to open the window and leave the plants to take air baths for 1 hour. Every day, the time is increased by 30-60 minutes, depending on the reaction of the plant. The last 24 hours before planting seedlings should already spend all day in the fresh air.

Planting seedlings in a permanent place
In closed ground transplantation is carried out in mid-May, in open - in early June. By the time of planting, the seedlings should have 7 full leaves. Transplantation is carried out only in the morning or in the evening, when direct sunlight does not fall on the bed. A week before the procedure, the place under the beds should be sprinkled with ash (300 g per 1 sq. M). You can make rotted sawdust (3-4 kg per 1 sq. M).
In the evening before planting, the soil is loosened to a depth of 10 cm. 2 hours before transplanting, holes 30 cm deep are formed. The distance between plants is kept at 30 cm, between rows - 50 cm. 2 l of water is poured into each planting pit, adding 3-5 liters manganese crystals. The bottom layer of foliage is removed from seedlings.
When the liquid is absorbed, a third of the pit is filled with earth, then carefully remove the plants from the pots, trying not to damage the roots, because by the time of transplantation they already occupy the entire area of the tank. Filling the holes with earth, they compact it to prevent the appearance of air holes and accelerate the survival of the plant. Seedlings growing in peat pots are immediately placed in the wells together with the pots.
After all work is completed, a well with a plant is watered with 1 liter of water. A support is driven in and plants are tied up.Important! When planting in a permanent place, superdeterminant varieties are better buried in the soil to half the height of the stem. Thus, it becomes possible to form a bush on 2 stems and provide firm fixation in the soil of the root system.
Outdoor Care
To get a good harvest, you need to organize tomato varieties Olya F1 proper care after transplantation, which includes such events:
- watering;
- fertilizer application;
- stepchildren;
- soil cultivation;
- garter
- preventive treatments against diseases and pests.
Watering
Watering is carried out once a day in the morning or in the evening, 600-800 ml of water per well. Adult plants are watered every 3-4 days, at the rate of 5 liters per 1 bush. If the season turned out to be rainy, then watering is stopped to prevent rhizome decay.
The temperature of water for irrigation of tomatoes should be at least + 20-24 ℃. When watering with cold liquid in the roots, metabolic processes slow down, tissue integrity is violated. This leads to yellowing and falling of leaves.
To facilitate the irrigation procedure, you can use one of 2 methods:
- Drip - It is an irrigation system located in the center of the garden with cuttings for each bush.
- Channel - represents a channel along the bed, from which small grooves extend to each bush. In the central ditch there is a water pipe supplying fluid to the small grooves.
Important! During watering, the liquid should flow directly under the root. Moisture on the green leads to sunburn or the development of fungal diseases.
Top dressing
Fertilizers are applied 3 times for the entire season:
- 10-12 days after transplanting into the ground;
- at the beginning of flowering;
- during fruit setting.
For the second time, the mineral composition is diluted in 10 liters of water in the following proportions:
- 15 g of potassium;
- 40 g of phosphorus;
- 25 g of nitrogen.
Stepson
The herding procedure is necessary to ensure the growth of the ovary. The tomato variety Olya F1 is notable for its low leafiness, so only the lower leaves are removed so that the green part does not come into contact with the soil. During the formation of the ovary, excess leaves are removed that interfere with the development of the fruit.
Soil care
After each watering, fertilizing and precipitation, the soil is loosened to a depth of 5 cm in the holes and 10 cm in the aisles. Mulching of the soil is carried out as necessary, for example, with severe drought, in order to retain moisture in the soil. As mulch, you can use green grass or compost.
When weeds appear, they need to be removed immediately, eliminating all roots. Hilling is carried out in the presence of tubercles in the lower part of the main stem, closer to the soil. This forms additional roots. As soon as they are sprinkled with soil, the full formation of secondary roots will begin, which will provide good strengthening of plants and enrich them with oxygen.Did you know? If a person is in a bad mood, he is advised to eat a tomato. Tomato contains serotonin - the hormone of happiness, which has a beneficial effect on the state of the nervous system and improves mood. Especially useful in this matter are pink and red varieties.

The procedure is carried out after irrigation or rain when the soil is wet. From the center of the row-spacings with a chopper, they carefully rake the ground to the base of the stem to completely cover the tubercles.
Important! The development of the secondary root system is also indicated by the blueing of the lower part of the stem. Usually this occurs some time after the first hilling and is a signal for a second procedure. From the moment of transplantation, secondary roots may begin to form 3 times per season, but may not form at all. In the absence of signs of formation of aerial roots, hilling is not carried out.
Bush tying
Bushes of tomato varieties Olya F1 reach a height of more than 1 m, so they need a garter. If this is not done, the plants will fall to the ground, which will lead to the spread of fungal spores after watering and decay of foliage and fruits.
There are several devices for garter tomatoes:
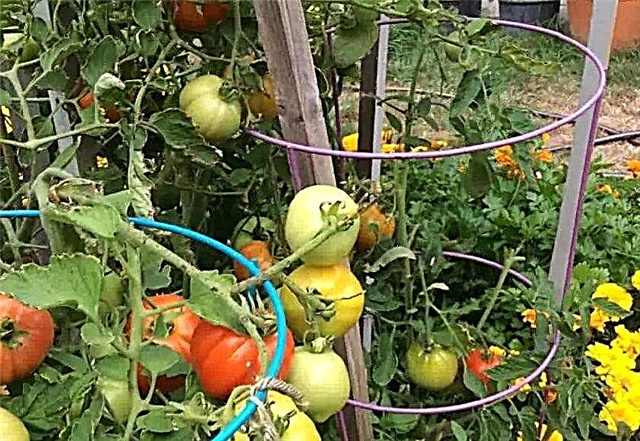
- Ready frame in the form of a cone or cylinder - the design is convenient, but expensive and disadvantageous when growing a large number of tomatoes. The frame is simply installed on top of the bush and maintains its shape.
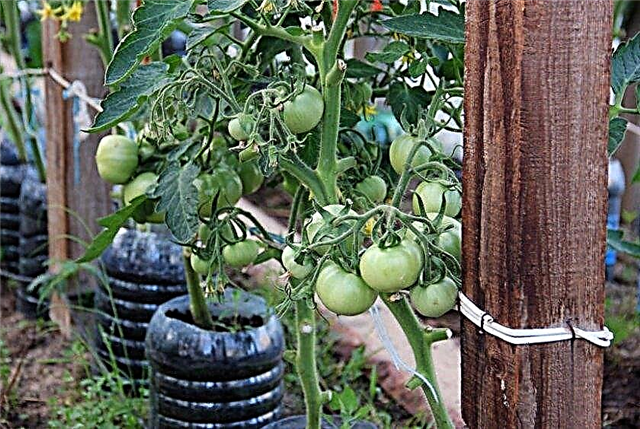
- Wooden stakes - the most budget option. A stake that exceeds the estimated height of the bush by 20–25 cm is driven next to the hole, and the plant is fixed to it using a rope. As they grow older, new shoots are tied up higher.
- Mesh and wire fences - between the rows are installed structures of 2 m in height. Bushes can be fixed in different places as they grow. The advantage of the design is the ability to use it for several plants at once, and not to organize a separate support for each.

Preventative treatment
To avoid the spread of diseases and pests, the following preventive measures must be observed:
- deep plowing of the soil in the autumn and before planting;
- growing tomatoes at a distance of at least 10 m from other solanaceous crops;
- refusal to grow tomatoes in areas where solanaceous plants infected with late blight grew for 4–5 years;
- compliance with the landing pattern;
- loosening of the soil after each moistening;
- pinching of lower leaves;
- regular watering and fertilizing;
- treatment with a 1% solution of Bordeaux fluid 3 times per season, starting from the moment of transplanting seedlings into the ground.
Harvesting
The fruits are harvested as they ripen. From the ovaries with unripe fruits, the ripe ones are separated one at a time with the peduncle. The fully ripened ovaries are separated entirely from the bush.
If you want to keep the crop longer, the tomatoes are laid in layers in wooden boxes, covered with paper. In the absence of such a need, the products are immediately processed.
Tomato Olya F1 is a high-yielding hybrid of universal purpose. Superdeterminant type plants take root well in open and closed ground, are not susceptible to temperature changes, easy to care for, which distinguishes them from plants of other varieties.


